Cleaver the Fibre
Warning
Be very careful not to touch the round circular blade located inside the fibre cleaver, it is extremely sharp. Tweezers are recommended for removing the cut fibres from the cleaver.
1. Using the fibre strippers (provided in the termination kit) and using the smallest strip option strip off around 40mm from the fibre core as shown in the picture.
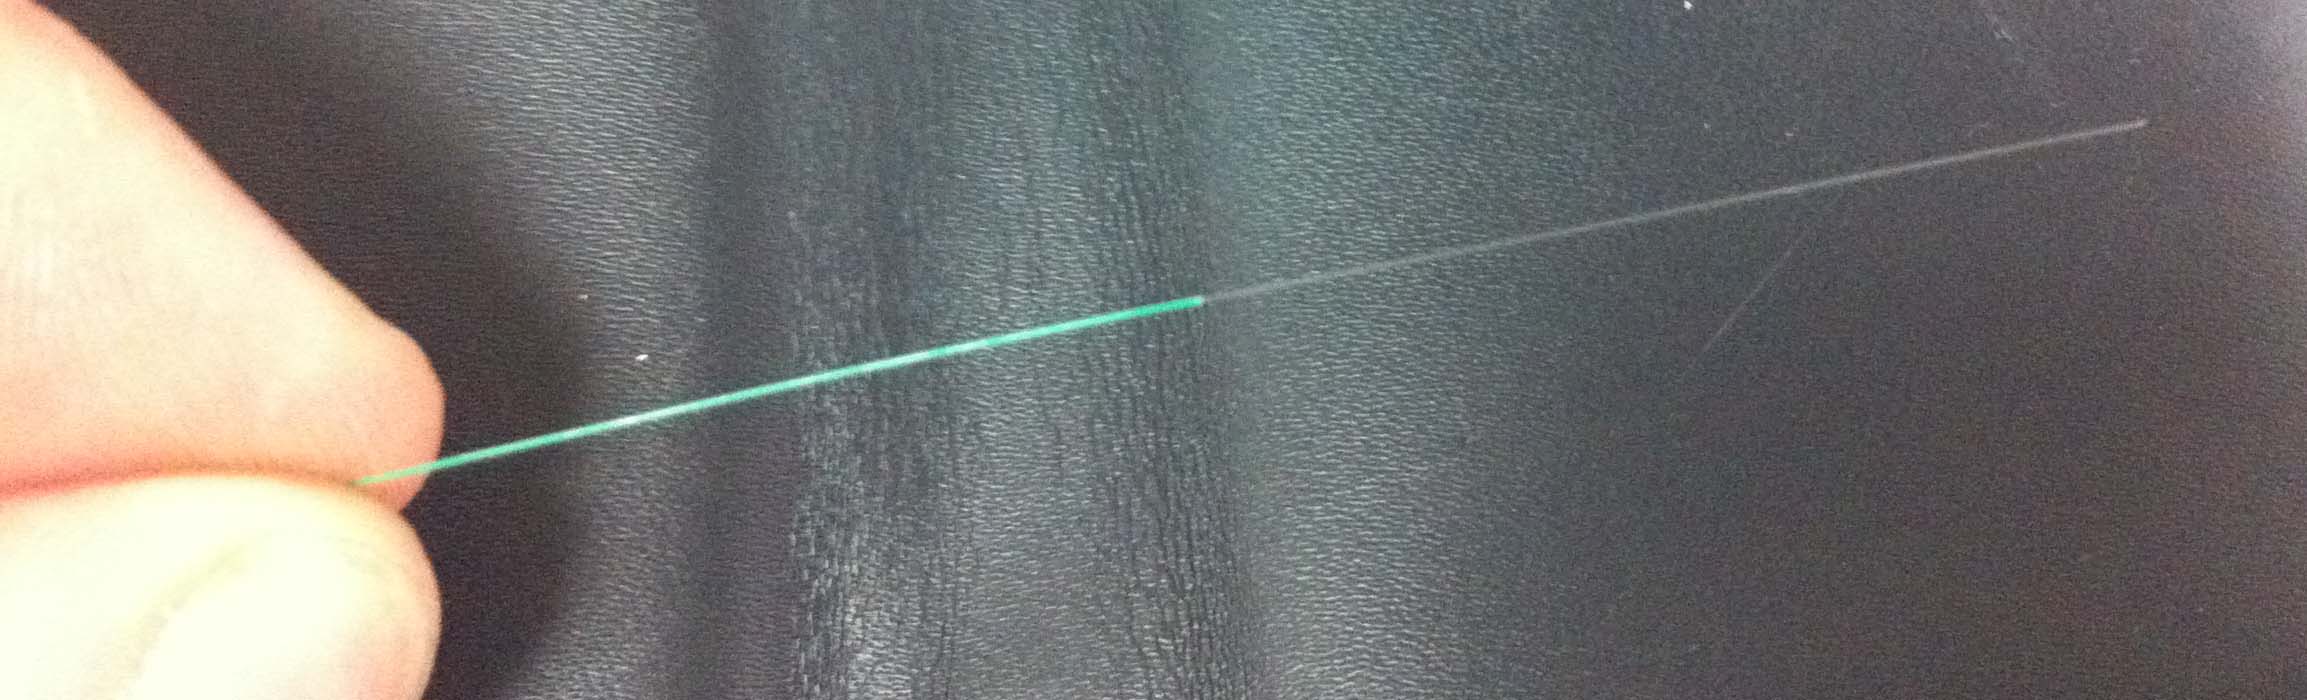
2. Once you have stripped the fibre, use cleaning alcohol and lint free wipes (provided in the termination kit) to clean off and dust or plastic shavings from the clear fibre core.
Repeat the a few times until completely clean.
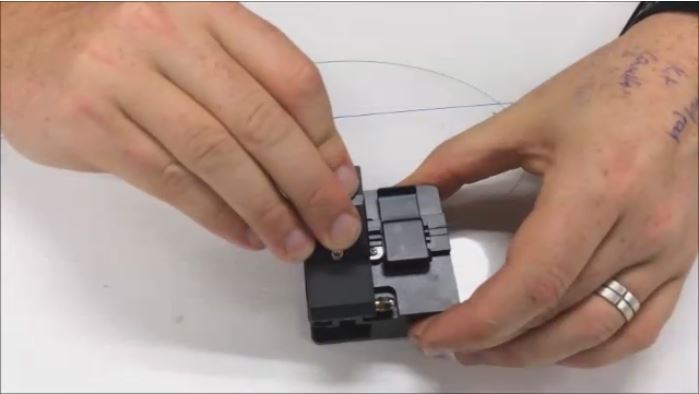
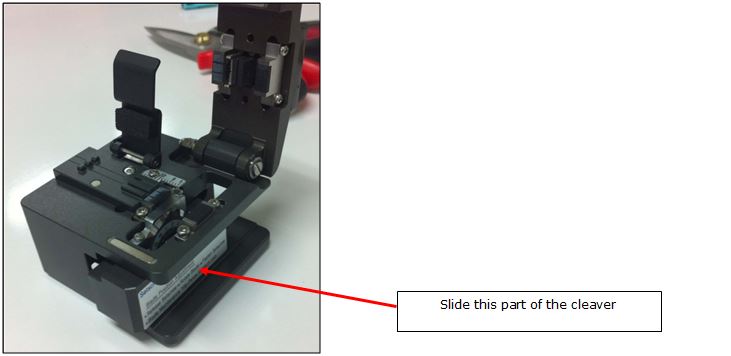
3. With the fibre cleaver slide the cleaver (blade) from the top to the bottom position. We want the blade in the bottom position before inserting the fibre cable.
4. Insert the fibre into the bottom groove of the cleaver. With the No-Polish SC connectors the cleave length required is 8mm. Therefore move the fibre until the end of the sheath (ie the coloured part of the outer sheath) is in line with the 8mm measurement.
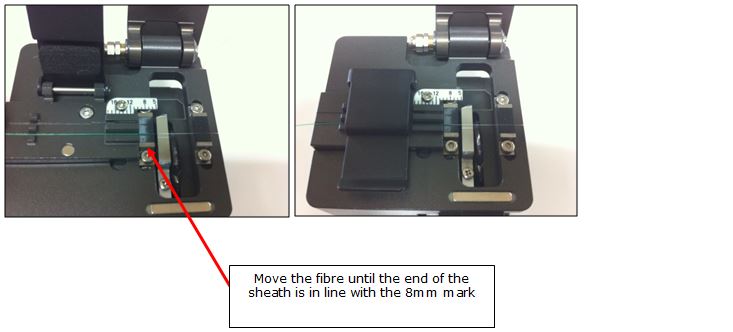
5. When the fibre is in position, close the left clamp of the cleaver. This will now hold the fibre in place securely (as shown in the above left picture above). Then close the right clamp.
6. Slide the cleaver (blade) from the bottom to the top position and this will cut the clear fibre in two. Once completed open the left clamp and remove your cut fibre cable. Place this down for the moment. Now open the right clamp and using tweezers remove cut portion of the fibre. You can throw away this portion of fibre which was cut off. Be very careful not to touch this fibre as it is very sharp.
7. Use cleaning alcohol and lint free wipes (provided in the termination kit) to clean the fibre cable you have just cleaved. Run the wipes along the clear fibre. Repeat the a few times until completely clean. This is now ready to be inserted into the connector.
Terminating the Fibre
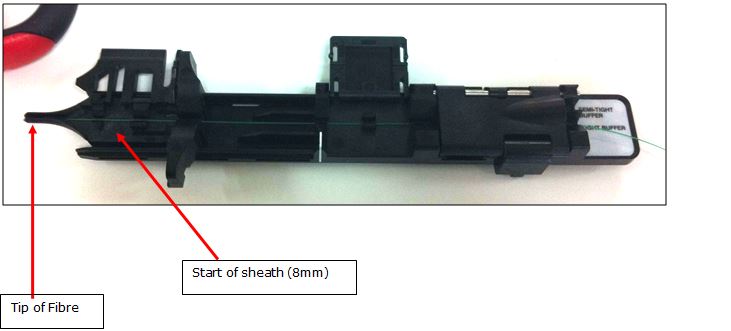
1. Place your cleaved fibre into the fibre insertion tool as shown below. First open each of the three latches. Then make sure the head (arrow pointed end) is in the extended position. Then place the fibre into the “Tight Buffer” groove so that the tip of the fibre is in line with the tip of the insertion tool head.
2. Close the right-most latch on the insertion tool which will clamp and hold the fibre in place.
3. Place a SC No-Polish connector into the connector holder as shown. You should have the white square facing up. You will also need to remove the plastic end cap from the SC connector before you can do this.

4. Use the insertion tool to slowly insert the fibre cable into the connector holder. You will notice some of the covers will pop open (this is normal). You should also notice when the line on the insertion tool meets the “Bow Start” line on the connector holder the fibre will bow (this means everything is alright).
Notes:
If the bow in the fibre is not seen when the line meets the “Bow Start” line then remove the fibre. This means the fibre has not been cut straight. You will need to re-strip the fibre and re-cleave it again. If this bow in the fibre is seen before the line meets the “Bow Start” line then slowly remove the insertion tool and slowly re-insert again.
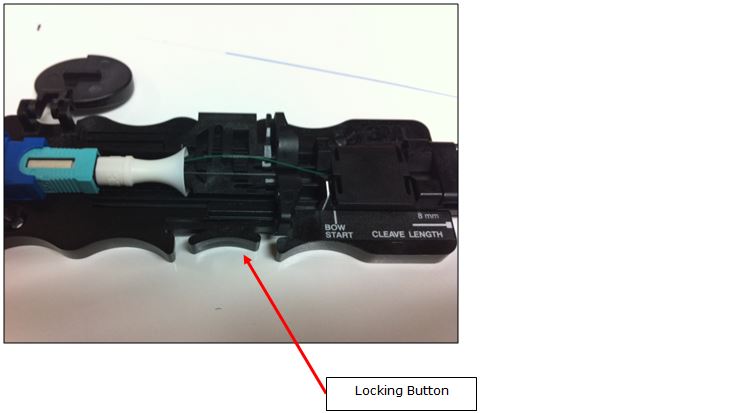
5. When the insertion tool is fully inserted then press in the locking button as shown on the above picture. This will allow the insertion tool to be pushed a little further into its locked position. When locked this will also hold everything in place.
6. Flip the circular latch down on the connector holder. This pushes into the SC connector and terminates the fibre with the connector. Hold this there for a few seconds.
7. Open the right most clamp on the insertion tool (this will release the fibre sheath). Then remove the fibre insertion tool (the fibre and SC connector should remain in place in the connector holder). Finally remove the SC fibre connector and you are done. Place the plastic SC connector cover back on until ready to use.
Click here to go to part three of the tutorial... Fibre Termination Part 3 - Installing the Fibre Cable
For more information on the products used in this tutorial, please follow the lnk below: ECS Fibre Networking PDF